BULLMQ Delayed Job 톺아보기
BullMQ의 delayed job이 실제로 어떻게 동작하는지 궁금하셨나요? Polling 방식일까요? 아니면 다른 방식일까요? 이 글에서는 BullMQ의 소스코드를 직접 분석하여 delayed job이 event-driven 방식으로 동작하며, Redis의 BZPOPMIN blocking primitive를 사용한다는 것을 확인합니다. TypeScript 코드가 어떻게 컴파일되고 실행되는지, Redis와 어떻게 통신하는지까지 깊이 파고 들어봅니다.
들어가며
평소에 BullMQ를 사용하면서 delayed job을 자주 활용했습니다. queue.add('job', data, { delay: 5000 })처럼 간단하게 5초 후에 실행되는 job을 만들 수 있어서 정말 편리했죠.
그런데 문득 궁금해졌습니다.
“BullMQ의 delayed job이 실제로 어떻게 동작하는지 궁금한데, 진짜 workerHost에서 polling 방식으로 bullMQ를 사용하는 서버 내부에서 polling이 일어나는 방식으로 동작하는거야??”
많은 개발자들이 delayed job이 주기적으로 Redis를 체크하는 polling 방식으로 동작할 것이라고 생각합니다. 예를 들어, 1초마다 Redis에 “지금 처리할 수 있는 delayed job이 있나요?”라고 물어보는 방식 말이죠.
하지만 실제로는 완전히 다른 방식으로 동작합니다.
“Polling은 아닐 것 같은데, 그럼 도대체 Redis의 어떤 구조를 이용하는 거지?”
이런 궁금증이 생겨서 BullMQ의 소스코드를 직접 파헤쳐보게 되었습니다. Redis의 Sorted Set, blocking primitive, Lua 스크립트 등이 어떻게 조합되어서 이런 효율적인 delayed job 처리가 가능한지 확인해봤습니다.
이 글에서는 BullMQ의 실제 소스코드를 분석하여:
- Delayed job이 어떻게 저장되고 관리되는지
- Worker가 어떻게 delayed job을 감지하고 처리하는지
- Polling이 아닌 event-driven 방식의 동작 원리
- TypeScript 코드가 실제로 어떻게 실행되는지
까지 깊이 파고 들어봅니다.
핵심 답변: Polling이 아닙니다
결론부터 말하면, BullMQ의 delayed job은 polling 방식이 아닙니다.
대신 Redis의 blocking primitive인 BZPOPMIN을 사용하는 event-driven 방식으로 동작합니다. 이는 훨씬 더 효율적이고 정확한 방식입니다.
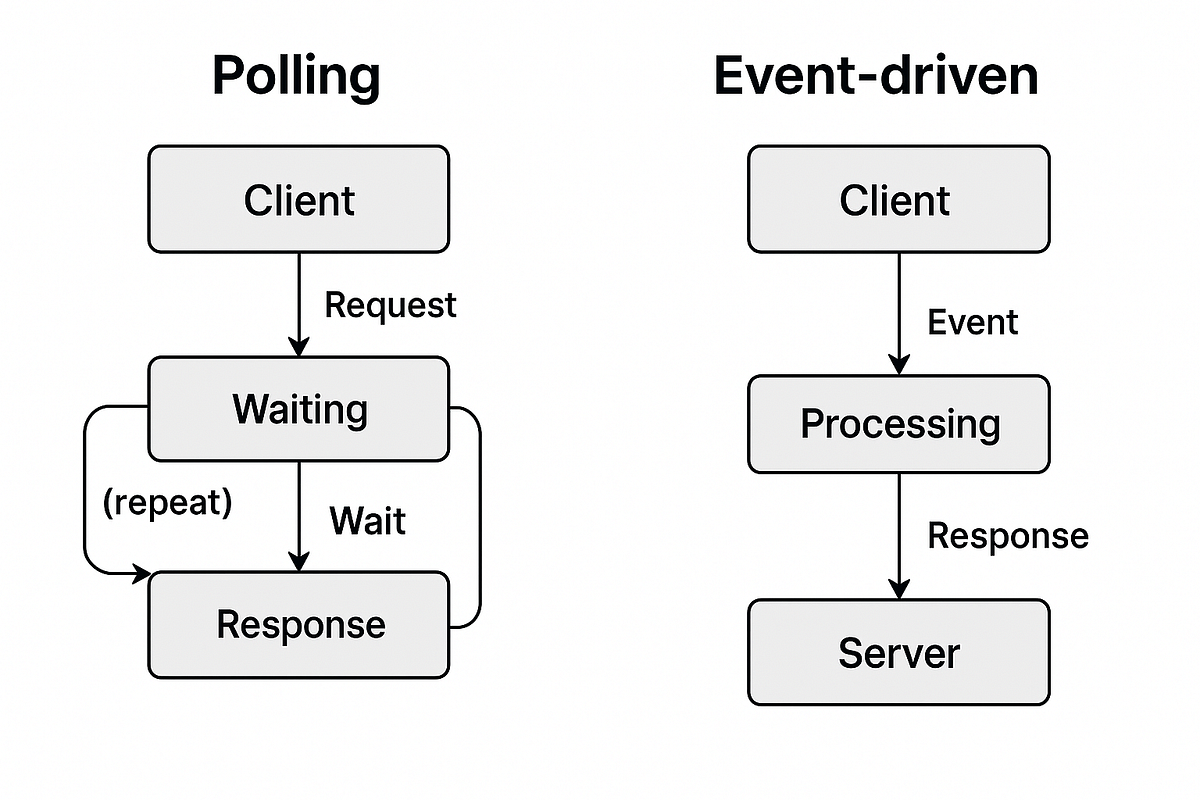
위 다이어그램은 Polling 방식과 Event-driven 방식의 차이를 보여줍니다. Polling은 주기적으로 체크하는 반면, Event-driven은 이벤트가 발생할 때만 반응합니다.
Delayed Job의 생명주기
Delayed job은 다음과 같은 생명주기를 거칩니다:
- Delayed: Redis Sorted Set에 저장 (timestamp 기반 정렬)
- Waiting: 시간이 되면 wait queue로 이동
- Active: Worker가 job을 가져와 처리 중
- Completed/Failed: 처리 완료 또는 실패
각 단계를 자세히 살펴보겠습니다.
1. Delayed Job 추가
await queue.add('job', { data: 'value' }, { delay: 5000 });이 코드가 실행되면 내부적으로 다음과 같은 일이 발생합니다:
local function addDelayedJob(jobId, delayedKey, eventsKey, timestamp,
  maxEvents, markerKey, delay)

  local score, delayedTimestamp = getDelayedScore(delayedKey, timestamp, tonumber(delay))

  rcall("ZADD", delayedKey, score, jobId)
  rcall("XADD", eventsKey, "MAXLEN", "~", maxEvents, "*", "event", "delayed",
    "jobId", jobId, "delay", delayedTimestamp)

  -- mark that a delayed job is available
  addDelayMarkerIfNeeded(markerKey, delayedKey)
end
핵심 포인트:
- Delayed job은 Redis의 **Sorted Set (ZSET)**에 저장됩니다
- Score는
timestamp * 0x1000 + jobId 일부 비트로 계산됩니다 - Marker key에 다음 delayed job의 timestamp가 추가됩니다
2. Worker가 Job을 가져오려고 시도
Worker의 mainLoop는 지속적으로 job을 가져오려고 시도합니다:
  private async mainLoop(client: RedisClient, bclient: RedisClient) {
    const asyncFifoQueue = new AsyncFifoQueue<void | Job<
      DataType,
      ResultType,
      NameType
    >>();

    let tokenPostfix = 0;

    while ((!this.closing && !this.paused) || asyncFifoQueue.numTotal() > 0) {
      /**
       * This inner loop tries to fetch jobs concurrently, but if we are waiting for a job
       * to arrive at the queue we should not try to fetch more jobs (as it would be pointless)
       */
      while (
        !this.closing &&
        !this.paused &&
        !this.waiting &&
        asyncFifoQueue.numTotal() < this._concurrency &&
        !this.isRateLimited()
      ) {
        const token = `${this.id}:${tokenPostfix++}`;

        const fetchedJob = this.retryIfFailed<void | Job<
          DataType,
          ResultType,
          NameType
        >>(() => this._getNextJob(client, bclient, token, { block: true }), {
          delayInMs: this.opts.runRetryDelay,
          onlyEmitError: true,
        });
        asyncFifoQueue.add(fetchedJob);

        if (this.waiting && asyncFifoQueue.numTotal() > 1) {
          // We are waiting for jobs but we have others that we could start processing already
          break;
        }

        // We await here so that we fetch jobs in sequence, this is important to avoid unnecessary calls
        // to Redis in high concurrency scenarios.
        const job = await fetchedJob;

        // No more jobs waiting but we have others that could start processing already
        if (!job && asyncFifoQueue.numTotal() > 1) {
          break;
        }

        // If there are potential jobs to be processed and blockUntil is set, we should exit to avoid waiting
        // for processing this job.
        if (this.blockUntil) {
          break;
        }
      }
_getNextJob 메서드는 moveToActive Lua 스크립트를 호출합니다:
  protected async moveToActive(
    client: RedisClient,
    token: string,
    name?: string,
  ): Promise<Job<DataType, ResultType, NameType>> {
    const [jobData, id, rateLimitDelay, delayUntil] =
      await this.scripts.moveToActive(client, token, name);
    this.updateDelays(rateLimitDelay, delayUntil);

    return this.nextJobFromJobData(jobData, id, token);
  }
3. promoteDelayedJobs: 핵심 메커니즘
moveToActive Lua 스크립트는 가장 먼저 promoteDelayedJobs를 실행합니다:
-- Check if there are delayed jobs that we can move to wait.
local markerKey = KEYS[11]
promoteDelayedJobs(delayedKey, markerKey, target, KEYS[3], eventStreamKey, ARGV[1],
                   ARGV[2], KEYS[10], isPausedOrMaxed)
promoteDelayedJobs 함수의 구현:
-- Try to get as much as 1000 jobs at once
local function promoteDelayedJobs(delayedKey, markerKey, targetKey, prioritizedKey,
                                  eventStreamKey, prefix, timestamp, priorityCounterKey, isPaused)
    local jobs = rcall("ZRANGEBYSCORE", delayedKey, 0, (timestamp + 1) * 0x1000 - 1, "LIMIT", 0, 1000)

    if (#jobs > 0) then
        rcall("ZREM", delayedKey, unpack(jobs))

        for _, jobId in ipairs(jobs) do
            local jobKey = prefix .. jobId
            local priority =
                tonumber(rcall("HGET", jobKey, "priority")) or 0

            if priority == 0 then
                -- LIFO or FIFO
                rcall("LPUSH", targetKey, jobId)
            else
                local score = getPriorityScore(priority, priorityCounterKey)
                rcall("ZADD", prioritizedKey, score, jobId)
            end

            -- Emit waiting event
            rcall("XADD", eventStreamKey, "*", "event", "waiting", "jobId",
                  jobId, "prev", "delayed")
            rcall("HSET", jobKey, "delay", 0)
        end

        addBaseMarkerIfNeeded(markerKey, isPaused)
    end
end
동작 방식:
- 현재 timestamp 이하의 delayed job들을 ZSET에서 조회
- 해당 job들을 delayed ZSET에서 제거
- Priority에 따라 wait queue 또는 prioritized queue로 이동
- Marker를 업데이트하여 worker에게 알림
4. Blocking Wait: BZPOPMIN
Job이 없을 때 Worker는 어떻게 동작할까요? Polling을 할까요?
아니요. Redis의 BZPOPMIN blocking primitive를 사용합니다:
  private async waitForJob(
    bclient: RedisClient,
    blockUntil: number,
  ): Promise<number> {
    if (this.paused) {
      return Infinity;
    }

    let timeout: NodeJS.Timeout;
    try {
      if (!this.closing && !this.isRateLimited()) {
        let blockTimeout = this.getBlockTimeout(blockUntil);

        if (blockTimeout > 0) {
          blockTimeout = this.blockingConnection.capabilities.canDoubleTimeout
            ? blockTimeout
            : Math.ceil(blockTimeout);

          // We cannot trust that the blocking connection stays blocking forever
          // due to issues in Redis and IORedis, so we will reconnect if we
          // don't get a response in the expected time.
          timeout = setTimeout(
            async () => {
              bclient.disconnect(!this.closing);
            },
            blockTimeout * 1000 + 1000,
          );

          this.updateDelays(); // reset delays to avoid reusing same values in next iteration

          // Markers should only be used for un-blocking, so we will handle them in this
          // function only.
          const result = await bclient.bzpopmin(this.keys.marker, blockTimeout);
          if (result) {
            const [_key, member, score] = result;

            if (member) {
              const newBlockUntil = parseInt(score);
              // Use by pro version as rate limited groups could generate lower blockUntil values
              // markers only return delays for delayed jobs
              if (blockUntil && newBlockUntil > blockUntil) {
                return blockUntil;
              }
              return newBlockUntil;
            }
          }
        }

        return 0;
      }
    } catch (error) {
      if (isNotConnectionError(<Error>error)) {
        this.emit('error', <Error>error);
      }
      if (!this.closing) {
        await this.delay();
      }
    } finally {
      clearTimeout(timeout);
    }
    return Infinity;
  }
핵심 코드: 808번 라인
const result = await bclient.bzpopmin(this.keys.marker, blockTimeout);이것이 바로 polling이 아닌 event-driven 방식의 핵심입니다.
BZPOPMIN이란 무엇인가?
BZPOPMIN은 Redis의 blocking primitive 명령어입니다. 이름에서 알 수 있듯이:
- B = Blocking (블로킹)
- Z = Sorted Set (정렬된 집합)
- POP = Pop (꺼내기)
- MIN = Minimum (최소값)
BZPOPMIN의 정확한 문법
BZPOPMIN key [key ...] timeout파라미터:
key: Sorted Set의 키 이름 (하나 이상 지정 가능)timeout: Blocking wait 시간 (초 단위, 0이면 무한 대기)
반환값:
- 요소가 있는 경우:
[key, member, score]배열key: 요소를 pop한 Sorted Set의 키 이름member: pop된 요소의 값 (member)score: pop된 요소의 score 값
- 요소가 없고 timeout이 지난 경우:
nil
동작 단계:
- 지정된 Sorted Set들 중 가장 작은 score를 가진 요소를 찾습니다
- 요소가 있으면 즉시 pop하여 반환합니다
- 요소가 없으면 timeout 초 동안 blocking wait합니다
- Blocking 중 다른 클라이언트가
ZADD로 요소를 추가하면 즉시 반환합니다 - Timeout이 지나도 요소가 없으면
nil을 반환합니다
여러 키를 동시에 대기하기
BZPOPMIN은 여러 키를 동시에 지정할 수 있습니다:
# 여러 queue를 동시에 대기
127.0.0.1:6379> BZPOPMIN queue1 queue2 queue3 10
이 경우, 어느 키든 요소가 추가되면 즉시 반환됩니다. BullMQ는 주로 단일 marker key를 사용하지만, 이 기능을 활용하면 여러 queue를 효율적으로 처리할 수 있습니다.
반환값의 구조 이해하기
BullMQ에서 BZPOPMIN의 반환값을 어떻게 처리하는지 보겠습니다:
          const result = await bclient.bzpopmin(this.keys.marker, blockTimeout);
          if (result) {
            const [_key, member, score] = result;

            if (member) {
              const newBlockUntil = parseInt(score);
              // Use by pro version as rate limited groups could generate lower blockUntil values
              // markers only return delays for delayed jobs
              if (blockUntil && newBlockUntil > blockUntil) {
                return blockUntil;
              }
              return newBlockUntil;
            }
          }
반환값 처리:
result[0](_key): 어떤 키에서 pop되었는지 (BullMQ에서는 marker key)result[1](member): Marker의 값 (보통"1")result[2](score): 다음 delayed job의 timestamp (밀리초 단위)
핵심: score 값이 바로 다음에 처리할 수 있는 delayed job의 시간입니다. Worker는 이 값을 newBlockUntil로 사용하여 정확한 시간에 다시 깨어납니다.
BullMQ에서의 사용
BullMQ는 BZPOPMIN을 marker key에 사용합니다:
          const result = await bclient.bzpopmin(this.keys.marker, blockTimeout);
          if (result) {
            const [_key, member, score] = result;

            if (member) {
              const newBlockUntil = parseInt(score);
              // Use by pro version as rate limited groups could generate lower blockUntil values
              // markers only return delays for delayed jobs
              if (blockUntil && newBlockUntil > blockUntil) {
                return blockUntil;
              }
              return newBlockUntil;
            }
          }
동작 흐름:
sequenceDiagram
    participant Worker as Worker
    participant Redis as Redis Server
    participant Marker as marker:queue (ZSET)

    Worker->>Redis: BZPOPMIN marker:queue 10
    Note over Redis: marker:queue가 비어있음
    Note over Redis: 10초 동안 blocking wait 시작

    Note over Marker: 다른 Worker가 delayed job 추가
    Note over Marker: ZADD marker:queue (timestamp, "1")

    Redis->>Redis: marker 추가 감지
    Redis-->>Worker: [key, "1", timestamp] 반환
    Worker->>Worker: Promise resolve
    Worker->>Worker: moveToActive 호출하여 job 처리
BZPOPMIN vs ZPOPMIN
| 명령어 | 동작 | Blocking |
|---|---|---|
ZPOPMIN | 가장 작은 score 요소 pop | ❌ 없음 (즉시 반환) |
BZPOPMIN | 가장 작은 score 요소 pop | ✅ 있음 (요소 없으면 대기) |
비교 예시:
# ZPOPMIN: 요소가 없으면 즉시 nil 반환
127.0.0.1:6379> ZPOPMIN myqueue
(nil)

# BZPOPMIN: 요소가 없으면 5초 동안 대기
127.0.0.1:6379> BZPOPMIN myqueue 5
(nil)  # 5초 후에도 요소가 없으면 nil 반환

# 다른 터미널에서 요소 추가
127.0.0.1:6379> ZADD myqueue 100 "job1"
(integer) 1

# BZPOPMIN이 즉시 반환됨
127.0.0.1:6379> BZPOPMIN myqueue 5
1) "myqueue"
2) "job1"
3) "100"
왜 BZPOPMIN을 사용하는가?
1. Polling의 문제점
만약 ZPOPMIN을 사용한다면 (polling 방식):
// 가상의 polling 방식 (비효율적)
while (true) {
  const result = await redis.zpopmin('marker:queue');
  if (result) {
    // job 처리
    break;
  }
  await sleep(1000); // 1초마다 체크
}
문제점:
- CPU 자원 낭비 (지속적인 루프 실행)
- 네트워크 트래픽 증가 (주기적 요청)
- 정확한 타이밍 보장 어려움
- Redis 부하 증가
2. BZPOPMIN의 장점
// 실제 BullMQ 방식 (효율적)
const result = await bclient.bzpopmin(this.keys.marker, blockTimeout);
// Redis 서버에서 blocking wait
// Marker가 추가되면 즉시 반환
장점:
- CPU 절약: 대기 중에는 리소스 사용 없음
- 즉각적인 반응: Marker가 추가되면 즉시 깨어남
- 네트워크 효율: 필요할 때만 통신
- 정확한 타이밍: Redis 서버에서 직접 관리
Redis 서버 내부 동작 메커니즘
Redis 서버는 BZPOPMIN 요청을 받으면 다음과 같이 처리합니다:
1. 즉시 체크 단계
// Redis 내부 의사 코드
if (sortedSetHasElements(key)) {
    // 요소가 있으면 즉시 pop하여 반환
    return popMinElement(key);
}
2. Blocking Wait 단계
요소가 없을 때:
-
클라이언트를 blocking 리스트에 등록
- Redis는 각 키별로 blocking 클라이언트 리스트를 유지합니다
- 클라이언트의 소켓과 timeout 정보를 저장합니다
-
이벤트 루프에서 대기
- Redis의 이벤트 루프는 다른 클라이언트의 명령어를 계속 처리합니다
- Blocking 클라이언트는 CPU를 사용하지 않습니다
-
요소 추가 시 깨우기
// 다른 클라이언트가 ZADD 실행 시
when (ZADD key score member) {
    if (hasBlockingClients(key)) {
        // Blocking 클라이언트 중 하나를 깨움
        wakeUpBlockingClient(key);
        // 즉시 BZPOPMIN 반환
    }
}
3. Timeout 처리
- Redis는 각 blocking 클라이언트의 timeout을 추적합니다
- Timeout이 지나면
nil을 반환하고 blocking 리스트에서 제거합니다
핵심 포인트:
- CPU 효율성: Blocking 중에는 Redis 서버도 클라이언트도 CPU를 사용하지 않습니다
- 즉각적인 반응: 요소가 추가되면 마이크로초 단위로 즉시 반환됩니다
- 확장성: 수천 개의 Worker가 동시에 blocking wait해도 Redis 부하는 거의 없습니다
이것이 event-driven 방식의 핵심입니다. Redis 서버가 직접 이벤트를 감지하고 클라이언트를 깨웁니다.
실제 예시
Redis CLI에서 직접 확인해볼 수 있습니다:
# 터미널 1: BZPOPMIN으로 대기
127.0.0.1:6379> BZPOPMIN marker:queue 10
(nil)  # 10초 후에도 요소가 없으면 nil 반환

# 터미널 2: 다른 곳에서 marker 추가
127.0.0.1:6379> ZADD marker:queue 1000 "1"
(integer) 1

# 터미널 1: 즉시 반환됨!
127.0.0.1:6379> BZPOPMIN marker:queue 10
1) "marker:queue"
2) "1"
3) "1000"
위 예시에서 볼 수 있듯이, BZPOPMIN은 요소가 없을 때는 blocking wait하고, 요소가 추가되면 즉시 반환됩니다.
// Worker 1: Job이 없어서 대기 중
const worker1 = new Worker('my-queue', async (job) => {
  return processJob(job);
});
// 내부적으로 BZPOPMIN marker:queue 10 실행
// Redis 서버에서 blocking wait 중...

// Worker 2: Delayed job 추가
await queue.add('job', { data: 'value' }, { delay: 5000 });
// 내부적으로 ZADD marker:queue (timestamp, "1") 실행

// Worker 1: 즉시 깨어남!
// BZPOPMIN이 marker를 감지하고 반환
// Promise resolve → moveToActive 호출 → job 처리
타임아웃 처리의 세부사항
BullMQ는 delayed job의 다음 timestamp를 기반으로 정확한 timeout을 계산합니다:
  protected getBlockTimeout(blockUntil: number): number {
    const opts: WorkerOptions = <WorkerOptions>this.opts;

    // when there are delayed jobs
    if (blockUntil) {
      const blockDelay = blockUntil - Date.now();
      // when we reach the time to get new jobs
      if (blockDelay <= 0) {
        return blockDelay;
      } else if (blockDelay < this.minimumBlockTimeout * 1000) {
        return this.minimumBlockTimeout;
      } else {
        // We restrict the maximum block timeout to 10 second to avoid
        // blocking the connection for too long in the case of reconnections
        // reference: https://github.com/taskforcesh/bullmq/issues/1658
        return Math.min(blockDelay / 1000, maximumBlockTimeout);
      }
    } else {
      return Math.max(opts.drainDelay, this.minimumBlockTimeout);
    }
  }
타임아웃 계산 로직:
-
Delayed job이 있는 경우:
blockDelay = nextTimestamp - 현재시간(밀리초)blockDelay <= 0: 이미 시간이 지났으므로 즉시 처리 (음수 반환)blockDelay < minimumBlockTimeout: 최소 대기 시간 보장 (기본 1ms)- 그 외:
blockDelay / 1000(초 단위로 변환), 최대 10초로 제한
-
Delayed job이 없는 경우:
drainDelay(기본 5초) 또는minimumBlockTimeout중 큰 값
왜 최대 10초로 제한하는가?
코드 주석에 나와있듯이, Redis 연결이 너무 오래 blocking되면 재연결 문제가 발생할 수 있습니다. 10초마다 한 번씩 연결 상태를 확인하여 안정성을 보장합니다.
실제 예시:
// 현재 시간: 1000000ms
// 다음 delayed job: 1005000ms (5초 후)
// blockDelay = 5000ms
// blockTimeout = 5초

// 현재 시간: 1000000ms
// 다음 delayed job: 10015000ms (15초 후)
// blockDelay = 15000ms
// blockTimeout = 10초 (최대값으로 제한)
이렇게 하면 delayed job이 처리 가능해지는 정확한 시간에 Worker가 깨어나며, 동시에 연결 안정성도 보장됩니다.
Event-driven vs Polling
Polling 방식 (사용하지 않음)
// 가상의 polling 방식 (BullMQ는 이렇게 하지 않음)
while (true) {
  const jobs = await redis.zrange('delayed:queue', 0, 0);
  if (jobs.length > 0 && jobs[0].timestamp <= Date.now()) {
    // process job
  }
  await sleep(1000); // 1초마다 체크
}
문제점:
- CPU 자원 낭비
- 네트워크 트래픽 증가
- 정확한 타이밍 보장 어려움
- 불필요한 Redis 부하
Event-driven 방식 (BullMQ가 사용하는 방식)
// 실제 BullMQ 방식
const result = await bclient.bzpopmin(this.keys.marker, blockTimeout);
// Redis 서버에서 blocking wait
// Marker가 추가되면 즉시 반환
장점:
- CPU 자원 절약 (대기 중에는 리소스 사용 없음)
- 네트워크 트래픽 최소화
- 정확한 타이밍 보장
- Redis 부하 최소화
전체 동작 흐름
sequenceDiagram
    participant App as Application
    participant Queue as Queue
    participant Redis as Redis
    participant Worker as Worker

    Note over App,Redis: 1. Delayed Job 추가
    App->>Queue: queue.add('job', data, { delay: 5000 })
    Queue->>Redis: ZADD delayed:queue (score=timestamp*0x1000, jobId)
    Queue->>Redis: ZADD marker:queue (score=nextTimestamp, "1")
    Redis-->>Queue: OK

    Note over Worker,Redis: 2. Worker가 Job 가져오기 시도
    Worker->>Redis: moveToActive (Lua script)
    Note over Redis: promoteDelayedJobs 실행
    Redis->>Redis: ZRANGEBYSCORE delayed:queue 0 ~timestamp
    alt 처리 가능한 delayed job 있음
        Redis->>Redis: ZREM delayed:queue
        Redis->>Redis: LPUSH wait:queue
        Redis->>Redis: ZADD marker:queue
    end
    Redis->>Redis: RPOPLPUSH wait:queue active:queue
    alt Job 있음
        Redis-->>Worker: Job data
    else Job 없음
        Redis-->>Worker: {0, 0, 0, nextTimestamp}
    end

    Note over Worker,Redis: 3. Blocking Wait
    Worker->>Worker: waitForJob 호출
    Worker->>Redis: BZPOPMIN marker:queue (blockTimeout)
    Note over Redis: Redis에서 blocking 대기
    Redis-->>Worker: (대기 중...)

    Note over App,Redis: 4. Delayed Job 시간 도래
    Note over Redis: 시간이 지나서 처리 가능
    App->>Queue: moveToActive 호출
    Queue->>Redis: moveToActive Lua script
    Redis->>Redis: promoteDelayedJobs 실행
    Redis->>Redis: ZADD marker:queue

    Note over Worker,Redis: 5. Worker 깨어남
    Redis-->>Worker: BZPOPMIN 반환
    Worker->>Worker: Promise resolve
    Worker->>Redis: moveToActive
    Redis-->>Worker: Job data
    Worker->>Worker: processJob 실행
Worker 클래스 구조
![]()
상속 구조
export class Worker<
  DataType = any,
  ResultType = any,
  NameType extends string = string,
> extends QueueBase {
EventEmitter (Node.js 내장)
↓ extends
QueueBase (Redis 연결, Scripts 관리)
↓ extends
Worker (Job 처리 로직)중요한 오해 해소: 상속 구조 ≠ Polling
많은 개발자들이 이 상속 구조를 보고 “EventEmitter를 상속받으니 polling 방식이 아닌가?”라고 생각할 수 있습니다. 하지만 이것은 완전히 다른 개념입니다.
EventEmitter의 역할:
EventEmitter는 이벤트를 emit하고 listen하는 기능만 제공합니다- Job이 완료되거나 실패했을 때
emit('completed', job)같은 이벤트를 발생시킵니다 - Job을 가져오는 방식과는 전혀 무관합니다
실제 Job 가져오기 방식:
- 상속 구조와 무관하게, 실제로는
BZPOPMINblocking primitive를 사용합니다 mainLoop에서waitForJob()→bclient.bzpopmin()호출- 이것이 polling이 아닌 event-driven 방식의 핵심입니다
비유로 이해하기:
상속 구조 = 건물의 구조 (어떤 층에 무엇이 있는지)
Polling vs Event-driven = 건물에서 사람을 찾는 방법 (주기적으로 방문 vs 벨을 누르면 나옴)
EventEmitter는 단지 “벨이 울렸을 때 알림을 받는 시스템”일 뿐, “사람을 찾는 방법”과는 무관합니다.
주요 컴포넌트
- QueueBase: Redis 연결, Scripts (Lua 스크립트 실행), QueueKeys 관리
- LockManager: Job lock 관리 및 갱신
- blockingConnection: BZPOPMIN을 위한 별도 Redis 연결
- mainLoop: Job을 가져와 처리하는 메인 루프
- Scripts: Redis Lua 스크립트 실행 (moveToActive, promoteDelayedJobs 등)
생성자에서 초기화
  constructor(
    name: string,
    processor?: string | URL | null | Processor<DataType, ResultType, NameType>,
    opts?: WorkerOptions,
    Connection?: typeof RedisConnection,
  ) {
    super(
      name,
      {
        drainDelay: 5,
        concurrency: 1,
        lockDuration: 30000,
        maximumRateLimitDelay: 30000,
        maxStalledCount: 1,
        stalledInterval: 30000,
        autorun: true,
        runRetryDelay: 15000,
        ...opts,
        blockingConnection: true,
      },
      Connection,
    );

    if (!opts || !opts.connection) {
      throw new Error('Worker requires a connection');
    }

    // ... validation code ...

    this.concurrency = this.opts.concurrency;

    this.opts.lockRenewTime =
      this.opts.lockRenewTime || this.opts.lockDuration / 2;

    this.id = v4();

    this.createLockManager();

    if (processor) {
      if (typeof processor === 'function') {
        this.processFn = processor;
        // Check if processor accepts signal parameter (3rd parameter)
        this.processorAcceptsSignal = processor.length >= 3;
      } else {
        // SANDBOXED - worker threads or child process
        // ...
      }

      if (this.opts.autorun) {
        this.run().catch(error => this.emit('error', error));
      }
    }

    // Blocking connection for BZPOPMIN
    const connectionName =
      this.clientName() + (this.opts.name ? `:w:${this.opts.name}` : '');
    this.blockingConnection = new RedisConnection(
      isRedisInstance(opts.connection)
        ? (<Redis>opts.connection).isCluster
          ? (<Cluster>opts.connection).duplicate(undefined, {
              redisOptions: {
                ...((<Cluster>opts.connection).options?.redisOptions || {}),
                connectionName,
              },
            })
          : (<Redis>opts.connection).duplicate({ connectionName })
        : { ...opts.connection, connectionName },
      {
        shared: false,
        blocking: true,
        skipVersionCheck: opts.skipVersionCheck,
      },
    );
    this.blockingConnection.on('error', error => this.emit('error', error));
    this.blockingConnection.on('ready', () =>
      setTimeout(() => this.emit('ready'), 0),
    );
  }
핵심 포인트:
blockingConnection: true옵션으로 별도의 blocking 연결 생성- 이 연결은
BZPOPMIN같은 blocking 명령을 위해 사용됨 - 일반 연결과 분리하여 blocking이 다른 작업에 영향을 주지 않도록 함
TypeScript → 실제 실행까지
1. 컴파일 단계
{
  "compilerOptions": {
    "types": ["node"],
    "target": "ES2017",
    "module": "ES2020",
    "incremental": true,
    "declaration": true,
    "outDir": "dist/esm",
    "sourceMap": true,
    "experimentalDecorators": true,
    "emitDecoratorMetadata": true,
    "strict": true,
    "jsx": "preserve",
    "importHelpers": true,
    "moduleResolution": "node",
    "esModuleInterop": false,
    "allowSyntheticDefaultImports": false,
    "strictNullChecks": false,
    "baseUrl": ".",
    "lib": ["esnext", "DOM"]
  },
  "include": ["src"],
  "exclude": ["node_modules", "dist", "tests/*", "src/commands/*.ts"]
}
TypeScript 소스코드가 ES2017 JavaScript로 컴파일되어 dist/esm/ 디렉토리에 출력됩니다.
2. Redis 연결
  private async init() {
    if (!this._client) {
      const { url, ...rest } = this.opts;
      this._client = url ? new IORedis(url, rest) : new IORedis(rest);
    }

    increaseMaxListeners(this._client, 3);

    this._client.on('error', this.handleClientError);
    // ioredis treats connection errors as a different event ('close')
    this._client.on('close', this.handleClientClose);

    this._client.on('ready', this.handleClientReady);

    if (!this.extraOptions.skipWaitingForReady) {
      await RedisConnection.waitUntilReady(this._client);
    }

    this.loadCommands(this.packageVersion);
ioredis 라이브러리를 사용하여 Redis에 TCP/IP 연결을 생성합니다.
3. Lua 스크립트 로딩
  protected loadCommands(
    packageVersion: string,
    providedScripts?: Record<string, RawCommand>,
  ): void {
    const finalScripts =
      providedScripts || (scripts as Record<string, RawCommand>);
    for (const property in finalScripts as Record<string, RawCommand>) {
      // Only define the command if not already defined
      const commandName = `${finalScripts[property].name}:${packageVersion}`;
      if (!(<any>this._client)[commandName]) {
        (<any>this._client).defineCommand(commandName, {
          numberOfKeys: finalScripts[property].keys,
          lua: finalScripts[property].content,
        });
      }
    }
  }
Lua 스크립트 파일을 읽어서 ioredis.defineCommand()로 커스텀 명령으로 등록합니다. 이후 호출 시 Redis에서 EVAL 또는 EVALSHA로 실행됩니다.
4. 네트워크 레벨 동작
sequenceDiagram
    participant Worker as Worker (Node.js)
    participant EventLoop as 이벤트 루프
    participant TCP as TCP/IP 소켓
    participant Redis as Redis 서버

    Worker->>TCP: await bzpopmin (blocking)
    TCP->>Redis: BZPOPMIN marker:queue
    Note over Redis: 대기 중...
    Note over EventLoop: 다른 작업 처리 가능

    Note over Redis: Marker 추가됨
    Redis-->>TCP: 응답 반환
    TCP-->>Worker: Promise resolve
    Worker->>Worker: 다음 코드 실행
핵심:
await bzpopmin()은 Promise를 pending 상태로 만듭니다- libuv가 TCP 소켓을 모니터링합니다
- Node.js 이벤트 루프는 다른 작업을 계속 처리할 수 있습니다
- Redis에서 marker가 추가되면 TCP 소켓을 통해 응답이 전달됩니다
- Promise가 resolve되어 코드가 계속 실행됩니다
Node.js 이벤트 루프와의 관계
graph TB
    A[mainLoop 실행] -->|await bzpopmin| B[Promise pending]
    B -->|libuv| C[TCP 소켓 대기]
    C -->|이벤트 루프| D[다른 작업 처리 가능]
    D -->|Redis 응답 도착| E[Promise resolve]
    E -->|다음 코드 실행| A

    style B fill:#ff9999
    style C fill:#99ff99
    style D fill:#ffcc99
핵심 포인트:
- Blocking wait는 Node.js 프로세스를 블록하지 않습니다
- 이벤트 루프는 다른 작업을 계속 처리할 수 있습니다
- 이것이 Node.js의 비동기 I/O 모델의 핵심입니다
NestJS와의 통합
NestJS에서 WorkerHost를 사용하는 경우도 내부적으로는 동일한 Worker 클래스를 사용합니다:
// @nestjs/bullmq 패키지 내부 (의사 코드)
class WorkerHost {
  protected worker: Worker; // BullMQ의 Worker 인스턴스

  constructor() {
    // NestJS가 자동으로 Worker를 생성
    this.worker = new Worker(queueName, this.process.bind(this), options);
  }

  async process(job: Job): Promise<any> {
    // 하위 클래스에서 구현
    throw new Error('process method must be implemented');
  }
}WorkerHost는 단순히 NestJS의 DI 시스템과 생명주기 관리와 통합하기 위한 래퍼일 뿐입니다. 실제 동작은 동일한 BullMQ Worker 클래스가 담당합니다.
핵심 코드 위치 정리
| 기능 | 파일 위치 | 핵심 코드 |
|---|---|---|
| Worker 클래스 | src/classes/worker.ts | mainLoop(), waitForJob() |
| Blocking Wait | src/classes/worker.ts:808 | await bclient.bzpopmin() |
| Delayed Job 추가 | src/commands/includes/addDelayedJob.lua | ZADD delayed:queue |
| Delayed Job Promotion | src/commands/includes/promoteDelayedJobs.lua | ZRANGEBYSCORE |
| moveToActive | src/commands/moveToActive-11.lua | promoteDelayedJobs() 호출 |
| Redis 연결 | src/classes/redis-connection.ts | new IORedis() |
왜 이 방식인가?
장점
- 효율성: 불필요한 polling이 없어 CPU와 네트워크 리소스를 절약합니다
- 정확성: Redis 서버에서 직접 시간을 체크하므로 정확한 타이밍을 보장합니다
- 확장성: 여러 Worker가 동시에 동작해도 문제없이 작동합니다
- 리소스 절약: Blocking wait 중에는 리소스를 거의 사용하지 않습니다
Polling 방식과의 비교
| 항목 | Polling 방식 | Event-driven 방식 (BullMQ) |
|---|---|---|
| CPU 사용 | 지속적 사용 | 대기 중 거의 사용 안 함 |
| 네트워크 트래픽 | 주기적 요청 | 필요할 때만 통신 |
| 정확도 | 주기 간격에 의존 | Redis 서버에서 직접 체크 |
| 확장성 | Worker 수에 비례하여 부하 증가 | Worker 수와 무관하게 효율적 |
결론
BullMQ의 delayed job은:
- Polling 방식이 아닙니다 - Redis의 blocking primitive (
BZPOPMIN)를 사용합니다 - Event-driven 방식 - Marker가 추가되면 Worker가 즉시 깨어납니다
- 효율적 - 불필요한 리소스 사용이 없습니다
- 정확함 - Redis 서버에서 직접 시간을 체크합니다
이러한 설계 덕분에 BullMQ는 수천 개의 delayed job을 효율적으로 처리할 수 있으며, 여러 Worker가 동시에 동작해도 문제없이 작동합니다.
Redis의 무한한 가능성
이번 탐구를 통해 Redis의 강력함을 다시 한번 느꼈습니다. 알면 알수록 재밌는 Redis입니다.
Redis를 비동기 Queue로 활용하기
Redis는 단순한 key-value 저장소가 아닙니다. Sorted Set, List, Blocking Primitives, Lua Scripts 등을 조합하면:
- Delayed Job 처리: BullMQ처럼 정확한 타이밍의 delayed job
- Priority Queue: Score 기반 우선순위 처리
- Rate Limiting: 시간 기반 요청 제한
- Distributed Lock: 분산 환경에서의 동시성 제어
- Pub/Sub: 실시간 이벤트 스트리밍
등 다양한 비동기 패턴을 구현할 수 있습니다.
Kafka vs Redis: 정답은 없다
많은 개발자들이 “큐가 필요하면 Kafka를 써야 한다”고 생각합니다. 하지만 항상 그런 것은 아닙니다.
Redis가 적합한 경우:
- 처리량이 초당 수만~수십만 건 수준
- 지연시간이 중요 (마이크로초 단위)
- 단순한 큐 구조로 충분
- 이미 Redis 인프라가 있음
- 개발 및 운영 복잡도를 낮추고 싶음
Kafka가 적합한 경우:
- 초당 수백만 건 이상의 처리량 필요
- 장기간 메시지 보관 필요 (일주일 이상)
- 복잡한 스트림 처리 (Kafka Streams)
- 여러 Consumer Group이 서로 다른 속도로 소비
- 대규모 분산 시스템
핵심은 상황에 맞는 선택입니다.
BullMQ처럼 Redis를 활용하면, Kafka 없이도 충분히 강력한 비동기 큐 시스템을 구축할 수 있습니다. 특히 delayed job, priority queue, rate limiting 같은 기능은 Redis의 Sorted Set과 Blocking Primitives로 매우 효율적으로 구현할 수 있습니다.
이번 탐구를 통해 Redis의 내부 동작 원리를 이해하게 되었고, 앞으로도 Redis를 더 다양하게 활용해볼 수 있을 것 같습니다.